by connecting a hose to the city water inlet,

or by filling your fresh water holding tank.
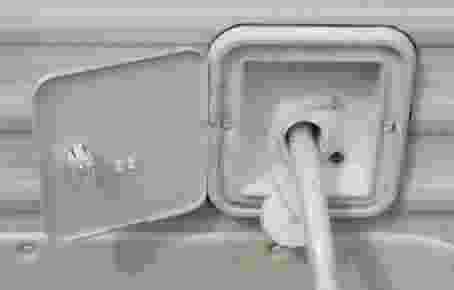
Use a hose that is safe to use for drinking water. If you connect to the city water inlet, always use a pressure regulator.
If you fill the fresh water holding tank, make sure the drain valve (if there is one) is closed. If the tank has a vent tube or valve, the tank will fill faster if the vent is opened. If the water chugs, glugs or spits back at you when filling the tank, either the tank does not have a vent, the vent is plugged or the vent is shut off. Turn the water faucet down a bit and let the tank fill at its own slow pace.
Using the water
City water
If you are hooked up to the campground water supply, it’s pretty simple. Just turn on the faucets. At first, the water may sputter a bit due to air inside the lines, so let the water run until all the air has been purged from the lines. Don’t forget to do the hot water faucets as well, especially if you drained the tank after your last outing.
Holding tank
If you are not hooked up to a fresh water supply, then you will need to use the water from your fresh water holding tank. If you know you are going someplace where you will need to do this, it might be best to prime the water lines (as above) before you leave home. That way, you won’t be using any of the water from the holding tank.
Fill the fresh water holding tank to the desired level. Go inside the RV and turn on the water pump. It will run until it thinks the lines have been primed, but there could be some air in the lines as well. Open the faucet that is closest to the water pump until the air has been purged from the lines. (If you didn't prime the lines before leaving home, you may want to prime them now.) Once this is done, the pump should stop running and not run again until you open a faucet. If you hear the pump running when there isn’t a faucet open, you may have a leak somewhere, or the hot water tank pressure relief valve may have opened a bit. Check it out to make sure everything is okay.
Remember, your water supply is limited to the amount of water in the holding tank, so make sure you do your best to conserve water whenever possible. When the holding tank is running dry, the pump may speed up, or the flow of water may slow down or stop. Turn off the power to the pump at this point.
Speaking of power, the water pump draws its power from the batteries. If you do not have electrical hookups, you will also need to conserve battery power. Turn off the water pump and anything else that will draw power from the batteries when they are not needed.
Hot water
Unlike the water heater in your house, the one in your RV needs to be handled differently.
Before lighting the gas pilot or turning on the electrical portion, MAKE SURE the tank is filled with water! Check that any bypass valves used for winterizing are in the correct position and have allowed the tank to fill with water.
If the hot water is too hot or not hot enough, look for the instructions for your water heater that should have come with your RV for how to adjust the water temperature.
You may see some water dripping from the hot water tank access panel on the outside of the RV. This is not uncommon and is caused by the pressure relief valve opening slightly to relieve the pressure caused by the expanding water inside the tank.
Where does it go?
All the water that goes down a drain goes into a holding tank. Flushing the toilet should go into what is called the “black” water tank. All the sinks and shower should drain into what is called the “gray” water tank.
RV’s use the same style of plumbing that is used in a home. “P-traps" are used to keep odors from coming back through the pipes from the holding tank. During storage, or extremely hot conditions, the P-traps could dry up and allow odors back into the RV. Use a good air-tight seal on all drains to help keep odors under control. The toilet usually dumps directly into the black tank, so there is no P-trap to keep odors out, but the valve for the toilet usually does a good job of keeping the odors out. During storage, or extremely hot conditions, make sure to keep plenty of water in the toilet bowl to help keep the seal moist and odors out. When winterizing, use the special RV anti-freeze in the P-traps and toilet bowl.
In many RV’s, the fresh, gray and black tanks are different sizes. Usually, the fresh water tank is the largest followed by the gray then the black. When this is the case, you may find yourself filling up the gray tank faster than expected. At these times, it would help if you could utilize the black tank for gray (sink) water. One of the easiest ways to do this is by placing a small tub in the sink. When it becomes full enough, carry it to the bathroom and pour it down the toilet.
Sooner or later, the gray and black holding tanks will become full and you will need to dump them.
The right tank
Is the toilet really the only thing that drains into the black tank? Most of the time, yes, but sometimes, no. Sometimes the manufacturers get lazy (or cheap) and drain the shower or bathroom sink into the black tank because it is easier. Some manufacturers will go a step above and have a separate gray tank for the kitchen and one for the bathroom. A simple test can tell you exactly where the water is draining to.
You’ll want to be at a campground where you have sewer hookups. You’ll also need one of those clear sewer hose elbows.
First dump and rinse the tanks like you normally would and close the drain valves. Next, mix up a gallon of water with something that will add some color to it, like Kool-Aid. Red and green might make good colors for this test. Pour about half a gallon down one drain at a time. Each time, going outside and opening a drain valve to see (here is why you need the clear elbow) which tank it is coming from.
If things aren’t draining into the right tank, it’s not that big of a deal. It just means you’ll need to watch your water usage and keep an eye on your tank monitor panel a little more closely.
Things NOT to put down the drains
Common sense should apply here, but just for a reminder, NO...
- Food scraps. Most kitchen sinks have some sort of strainer/plug for them. Use it!
Grease or oil from cooking. And definitely not the automotive kind!
Caustic cleaners or solvents. You probably don’t need these in your RV anyway.
Flammable liquids.
And for the toilet, all of the above plus no feminine hygiene products, paper towels or anything you didn’t eat or drink first.
Weight
Keep in mind that water weighs roughly 8.25 pounds per gallon. Carrying around all that extra weight could have an effect on how your rig handles. It is probably more critical for travel trailers due to the possible location of all of the tanks and how they could affect tongue weight. Many trailer manufacturers do not keep this in mind when designing the trailer, so it is left up to the buyer.
Most trailers that I have seen have their fresh water holding tank relatively close to the kitchen area. Another clue to their location could be where the fresh water tank fill is located. Black tanks are almost always directly under the toilet. And the gray tanks can be almost anywhere.
One way to find out for sure is to look underneath the trailer. But if the manufacturer has covered things up underneath, you’ll have to use one of the other methods.
So how does tank location affect tongue weight?
Simple.
If a tank is located forward of the trailer axles, a portion of its weight will end up as tongue weight. This could overload the tow vehicle or cause handling problems from too much weight on the rear axle and not enough weight on the front axle.
Tanks located to the rear of the axles will lighten the tongue weight. This could lead to trailer sway.
No comments:
Post a Comment