For the rest of us that live in climates where the temperatures drop below freezing during the winter, this is an important step for the survival of your RV’s water system.
The basic goal is remove as much water from the plumbing system as possible. There are some things you should consider doing on your last trip out for the year:
- Open all faucets, open the low point drains (if equipped) and don’t forget to step on the toilet flusher to get as much water out of the system
- Drain all the holding tanks and hot water heater tank.
- Flush the gray and black tanks thoroughly. Do not use any toilet chemicals.
Air
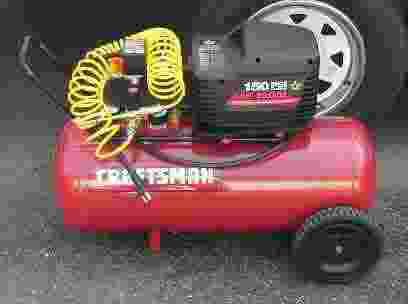
A source for the air is needed. Most gas stations have an air hose you could use, if you can get to it with your RV. You could also purchase your own air compressor. I had the small 2 gallon electric compressor shown below (about $90) before buying our trailer. It does a great job of filling up bicycle tires and car tires, but it just isn’t convenient for blowing out the water lines. I used it until I bought the larger 15 gallon tank compressor (about $180). The 2 gallon compressor would need to cycle several times before I felt that most of the water was out of the lines. This would take about an hour. But with the 15 gallon compressor, I turn it on, let if fill up the tank, wheel it to the trailer and let it blow! Now it takes about 15-20 minutes.
If you use an air compressor, make sure it is an “oil-less” type. Otherwise you may end up with some funny tasting water that you may not be able to get rid of.
A 2 gallon compressor

A 15 gallon compressor
To use air, you will need a special adapter for your city water inlet, like this one.

Just screw it into your city water inlet.
If you are using a source for the air that does not have an outlet pressure regulator that you can adjust (like at a gas station), this is where one of those cheaper water pressure regulators would come in handy. Screw the adapter into the regulator and then screw the regulator into the city water inlet. You don’t want to be filling up the water lines with air at a higher pressure than what they can handle.

If you are using an air compressor, you should be able to adjust the outlet pressure. Set it for 40 psi and you’re ready to go. If you cannot adjust the outlet pressure, get one of the cheaper water pressure regulators and screw the adapter into it and then screw the regulator into the city water inlet.
It is possible that using air to blow the water out of the lines may not do as good of a job as you would like. And you may not find this out until spring or the next time you go to use your RV and discover a water leak from a cracked or broken pipe. And there are a few places, like the drains, where you will want to use the RV anti-freeze to protect them. In addition to, or instead of using air, you may want to consider using
RV Antifreeze
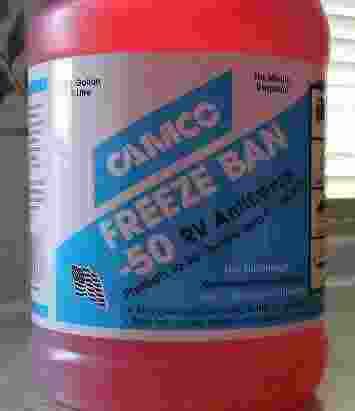
RV anti-freeze is a special type of anti-freeze. It is not like the kind you put in your car’s radiator, so DO NOT USE automotive anti-freeze for this process!!!
Unlike the automotive anti-freeze, RV anti-freeze is safe to drink in small quantities. If some of it were to remain in the lines after you had flushed it out for your next trip, it won’t hurt you. It may not taste real good, but it won’t hurt you.
There are three ways to get the RV anti-freeze into the water system.
The first method would be to pour the RV anti-freeze into the fresh water holding tank and use the water pump to pump it through the system. One major problem with this technique is that the supply line from the fresh water holding tank may not be in the best spot to pick up the RV anti-freeze that is in the tank. It could take several gallons to accomplish the task. And you will need to do a thorough rinsing of the tank before you use it for fresh water storage. Therefore, I don’t recommend this method.
The second method is to use a hand pump specially designed for this task. One end of a hose connected to the hand pump goes into the bottle of RV anti-freeze while the end of another hose attaches to the city water inlet. Then it’s just a matter of pumping the RV anti-freeze into the RV water lines. But if you’re like me (lazy), this sounds like a lot of work.
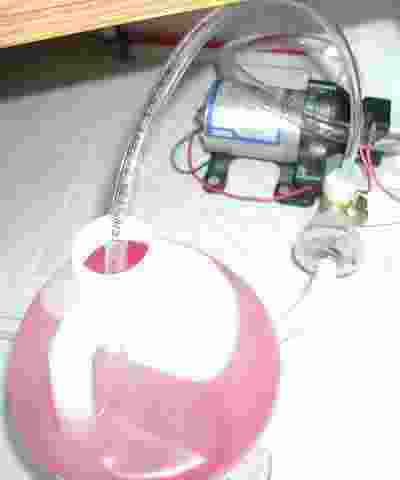
The last method is to install a special kit so you can use the water pump that is already in your RV to suck the RV anti-freeze out of the bottle and into your water lines.
Since the RV anti-freeze isn’t cheap (usually $2-$3 a gallon), you don’t want to be filling up your hot water tank with the stuff (and you really don’t need to) if you can avoid it. And you can, by installing a hot water tank bypass kit. Even if you pay a service center to install it for you, the savings from not having to buy the extra 6-10 gallons to fill up the water heater will pay for the installation, eventually.
The Procedure
Whether you use air or RV anti-freeze, the process is basically the same
If you have a hot water tank bypass installed, make sure the valves are in the correct position. If you don’t have a bypass kit installed, you may want to consider installing one. Otherwise, you will need to fill the hot water tank with anti-freeze to get the anti-freeze through the hot water lines.
If you have any in-line water filters, such as under the sink, either remove them or turn off the valve that is usually found in the supply line for the filter before pumping the RV anti-freeze through the lines. (If you are using air to blow out the lines, you won't have to worry about this step.)
Go through the RV and open each faucet, one at a time, both hot and cold, for all sinks, showers and the toilet.
- If using air, you’re looking for just air to be coming out of the faucet. Once it stops spitting water, you can close the faucet.
- If using RV anti-freeze, you’re looking for it to come out of the faucet. That’s why it is usually pink in color (and often referred to as “the pink stuff”). Once you see it, let it continue to run for about 15 seconds to make sure it has completely filled up the line.
Don’t forget about any outside plumbing fixtures you might have, like the outside shower.
Once the anti-freeze has been run through all the lines, open at least one hot and one cold water faucet to relieve the pressure.
Also pour about 1 cup of RV anti-freeze down each drain to help prevent the P-trap from freezing up. Somewhere along the way, pour an extra cup down a sink drain to make sure there is some in the gray water holding tank to keep the valve from freezing.
And don’t forget about the toilet! Flush 1 cup down the toilet into the black tank to keep the valve from freezing, and then pour another cup into the bowl to cover up the seal and prevent it from freezing and drying out.
If you use the RV anti-freeze, before you take your next trip, you will want to thoroughly flush the water system. You should sanitize the water system each spring, or if you are just taking a mid-winter trip somewhere, you may skip adding the bleach, but do a thorough flush of the system before using the water.
No comments:
Post a Comment